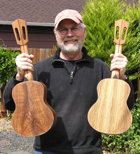
"I take ideas from everywhere." ~ Benito Huipe
Special Tools, Jigs, and Fixtures
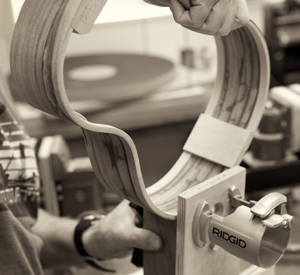
Luthiers make many of their own tools, often out of necessity. Below are some of the jigs and tools that I've made. Methods of work are also revealed by the tools.
Tools are enjoyable to build. I think the problem solving is a big appeal to me personally. Or maybe it's just a different aesthetic than instrument building, or a break from caring so much about how things look.
I use almost all of these tools on every instrument I build. I'm building fewer jigs now, but I'm tweaking the ones I have.
Luthiers tend to share their ideas and creativity with other luthiers, even with those who might normally be considered competitors. I'm not sure what it is that makes luthiers more generous in this way than other entrepreneurs, but I've seen the behavior again and again. These photos and explanations are offered in that spirit.
I am now doing some lutherie teaching. Please see my Instruction Page for more information.
Saddle Shim Cutting Guide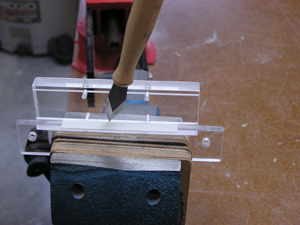
This tool is my own design. It aligns bone shim stock and a blade to cut precise 1/8" saddle shims. And the back has a slot to hold the shim for sanding.
A video on how this works and how I made it can be seen on YouTube here.
These are available for purchase (holder only) for $39 plus shipping. While they last. Contact me if you're interested in purchasing one.
Bridge Slotting Jig
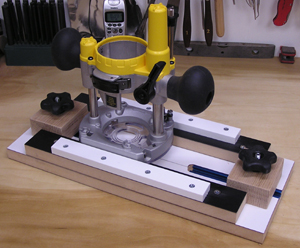
This jig allows accurate routing of saddle slots into bridges. Shown with the plunge router base it will be used with.
Fret Press and Tower

I like to press in my frets at eye level, so I built this stand to elevate my inexpensive arbor press.
Downdraft Table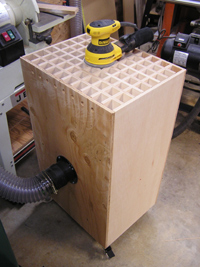
This was a no-brainer once I had central dust collection. It's not much more than a box on casters with some baffles inside and a grid on top. Works great as long as the work isn't too big. I use it without a dust mask.
Side sound port cutting jig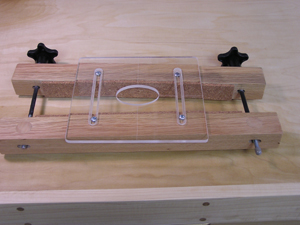
This template clamps to a ukulele side for cutting an elliptical hole for a sound port with a router. This size of the hole is controlled by using different guide bearings and different sized router bits.
Circle cutters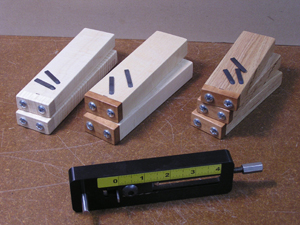
These are precision manual circle
cutters for cutting sound holes and rosette channels. The black
adjustable one in the front is an expensive commercial version with
a scale that I added. The seven behind it will be fixed
radii (non-adjustable) when I add axis pins as I determine the radii
needed. The loose blades (on top of them) are $4 replacement blades
for the commercial version that have yet to be sharpened, but will
be clamped by the small wood blocks with the two screws. Brass
threaded inserts are concealed by the clamps.
The point is the ability to return precisely to a previously used
setting which is lost when the commercial version is re-set. A
secondary benefit is efficiency in set-up time once each radii is
fixed.
The adjustable commercial version cost $84 each, my shop-made
non-adjustable versions cost $5 each. Plus a little work.
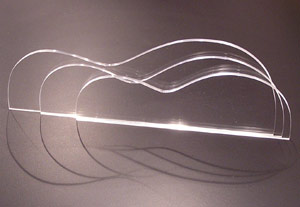
Half templates
A fundamental tool. Many uses from the shaping of body molds to the instrument tops and backs. Shown are three sizes of ukuleles.

Split Body Mold
Shown here with a bending form, a plastic half template, and a paper bracing template. The body of the instrument is built inside this mold which helps force the shape of the bent sides. One each of these molds must be made for each body size and shape built.
Fox Side Bender
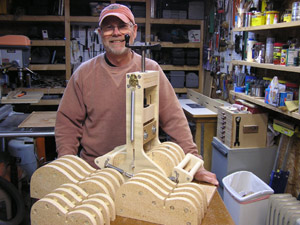
In my opinion, the king of all lutherie jigs. A system of molds and cauls for bending the sides of an instrument with heat. I learned to build this from the inventor himself, Charles Fox. This one is adapted to ukuleles. Shown with 4 sizes of ukulele molds. The heat blanket, steel slats, heat controller, and other essential items are not shown here.

Hot Pipe Rig
This is another method for bending wood; over a hot pipe. Time consuming but better control than a Fox style bender. It's especially useful for fine tuning previously bent work and the super tight bends in my "rope" rosettes. The pipe, torch and vise were purchased; all I had to make was the torch stand.
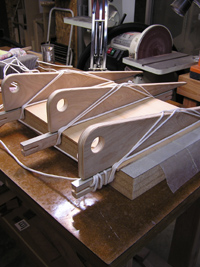
Edge joining clamp.
This is an ancient method for joining bookmatched top and back plates. The wedges apply simultaneous downward and horizontal clamping pressure.
Shown in use.

Adjustable vise wedge
This allows parallel vise jaws to clamp a wedge shape, like the instrument head shown.
This was an early jig and is shown with the neck from my tenor ukulele kit.
This tool became obsolete when I upgraged my vise a few years ago, but I've left it here as it might be of use to a student with limited space or funds.

Brace Radiusing jig and bumper
This is for sanding a 15 foot (or greater) radius into the bottom of my bracing. The stock is held by the shopmade clamps, and the slightly curved base rides against the angle aluminum bumper as the belt sander grinds the curve. A time saver!

Head and Tail block radiuser
Another bumper guided sanding jig. This one for putting the curve into heel and end blocks.

Circle Cutting Trim Router Base
Self explanatory.
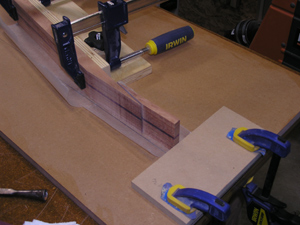
Scarf Joint Jig
The main function of this jig is the cutting of accurate neck scarf joints on the band saw. Pictured is the secondary function of gluing the scarf joint.
The scarf joined neck is generally considered stronger than the one piece neck.

Dovetail Jig
This is the jig I use in conjunction with a router to cut the dovetail pins into the necks and the dovetail slots into the bodies. It allows subtle adjustments of that joint. Thanks Robbie O'Brien for the design!
This tool has been modified countless times (early version shown), but continues to be useful, even on my instruments with bolt-on necks.

Fingerboard Taper Jig
This is a table saw sled that helps cut a taper into my fingerboards. One side cuts one side of the fingerboard, the other side, the other.

Binding Slot Cutter
This elaborate router base remains stationary as an instrument body's edge is turned against it to cut the rabbits for the edge binding. There's a bit of a learning curve with this one. Not for the faint of heart!
To see a video of this tool in action, click here.
Note - I no longer use this tool since I upgraded to a Harry Fleishman style binding jig (with the same trim-router). But this one served me well for a number of years.
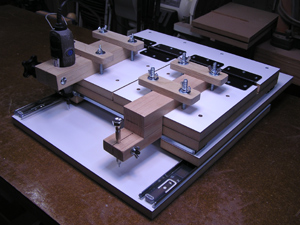
One to one Pantograph Duplicator
This rather complex device is for cutting inlay and inlay channels with a Dremmel tool (left) and follower in a pin vise (right). It's movement is based on ball-bearing drawer sliders.

Go Bar Deck and Sanding Dish
Uses wooden dowels or other flexible material as a compression clamp. Shown here clamping the center strip onto the inside of a ukulele back. It's an elegant system; powerful, precise, and simple.
Also shown (in green) is a radius sanding dish. This particular one is a 15 foot radius which is the radius I use on my backs. It's used primarily for sanding but also as a clamping mold/caul as shown here.
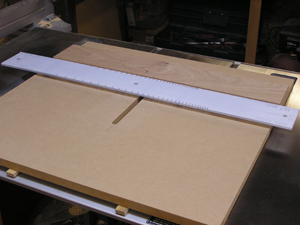
Fret Slotting Table Saw Sled
This sled rides in the table saw miter slots and uses an accurate plastic template (in white) that registers with a metal pin in the fence to cut precise fret slots in fingerboards. The 0.023" thick blade protrudes from the slot in the sled. Faster and much more precise than hand cutting.
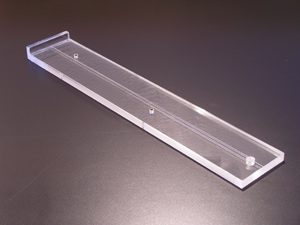
Fingerboard Registration Drill Guide
It's of crucial importance to accurately place the fingerboard on the neck when gluing. Glue is slippery when wet and this template with brass lined guide holes helps place 1/8" wooden registration pins to lock the fingerboard in place.

Deep throat thickness caliper
Used for precisely measuring wood thickness under one inch. Accurate to 0.001".
I've since made a stand for this so I don't have to clamp it in a vise.

Precision Sanding Blocks
These foot long aluminum blocks are precision ground flat to 0.001". I use 220 grit with a shooting board for final preparation of book matched plate joints, 600 grit for fret leveling, and 120 grit for general purpose flattening work. Handy tools but some tedious grinding to make.
I learned how to make these from an article in the Journal of American Lutherie. I no longer use these on frets, but I've found countless other uses for them.

Vacuum Pump Rig
Vacuum makes for exceptional clamping. It pulls 21 inches of mercury. Design by Joe Woodworker. See various clamps below.
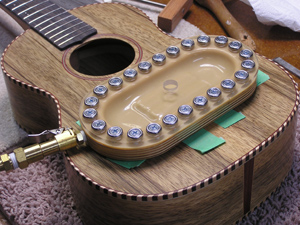
Vacuum Bridge Clamp
It's difficult to clamp a bridge to an instrument body due to the precision required, the force required, and the fragility of an instrument top. This vacuum clamp solves it. Shown in use on Tenor Ukulele #7. These are commercially available for guitars. Uke builders have to make them.

Vacuum bench clamp
It's difficult to hold a fragile instrument body for two handed operations like scraping. This clamp can be used as shown or turned 90° to hold a body perpendicular to the bench.
Shown with a 6" ruler for scale and the convex radiused sanding block I used to grind a hollow into the clamping face.
You can see the vacuum pump under the bench.
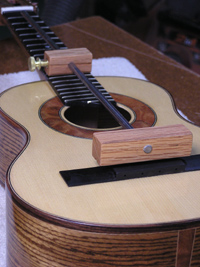
Bridge locating scale gauge
This device helps to precisely locate the bridge prior to gluing.
Shown in use with Cavaquinho #6

Fingerboard Radiusing Jig
Quickly grinds a radius into a fingerboard by rocking a carriage in a frame.
This contraption clamps to a belt sander. The bottom photo shows the frame and bearings, the middle photo shows the carriage, cams, and vacuum clamp, the top photo shows the device ready to operate.
I recently swapped out the vacuum clamp for a formica surface and double-stick tape. I had designed the vacuum clamp to work for all sizes of ukuleles and it didn't work on any of them very well. So that feature is back on the drawing board.
Update - I still use this jig on every fingerboard I make, but I no longer use the vacuum clamp as it never worked the way I intended. I use double sided tape instead.
Wood Milling Setup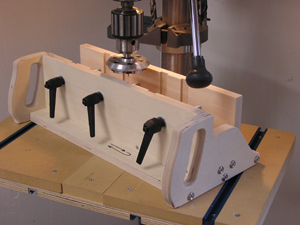
This combines a drill press planer from MusicTools (Brazil) and a jig that I modified from a Charles Fox design. The primary purpose is to tapir and flatten the area under the fingerboard on an instrument neck. But it has other uses too. The holder moves over the table freehand under the drill press mounted cutter.

Router Table
A router table isn't really a specialty luthier tool, but luthiers use them and I built this one so I thought I'd include it. I got the design from a book.
I hope you enjoyed my little tour. Special thanks to Charles Fox, Mark Roberts, Robbie O'Brien, Gordon Mayer, Michael Grigg, and all the participants of the Robert O'Brien Guitar Building Forum for your ideas and support.
~ Howard Replogle

